 0
0 0
0 4
4 0
0 0
0 0
0


Food Photography is a pain, plain and simple. When you ask food bloggers how to get good pictures 9 times out of 10 their first advice is “Get the right kind of camera.” There are bloggers that swear by using an iPhone or other high end phone for pics but most of us use a DSLR. My Mom is a professional photographer and owns several Canon DSLR’s and purchased me a Canon Rebel T3i DSLR as a gift. I love it, honestly I do, but seriously, it is to bulky for me. Carrying it around when I go out to events is back breaking and I always have to worry about dropping it or god forbid stolen.
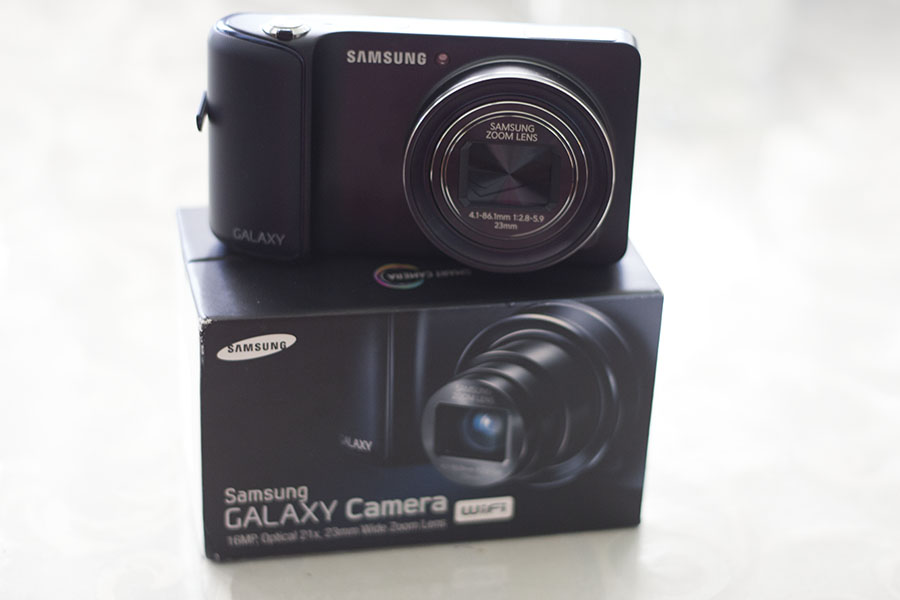
About a month ago I was talking to the wonderful reps at QVC and mentioned this post and could they recommend a good camera to mention. Color me shocked when they offered to send me a camera to review! I nearly died when I found out it was the Samsung Galaxy Camera. This is like the rolls royce of point and shoot cameras. This camera thinks it’s a smart phone and incredible. Before we get into the food photography I want to let you know a little bit about the specs:
- Includes EK-GC110ZWAXAR Galaxy camera, two rechargeable batteries, charger, data cable, strap, pouch, 8GB microSDHC card, Corel software
- 16.3 megapixels
- 1/2.3″ BSI CMOS image sensor
- Samsung 23mm wide-angle lens
- 21X optical zoom
- 4.8″ diagonal TFT HD Super Clear LCD display with 1280×720 resolution
- Android 4.1.2 Jelly Bean OS
- 1.4GHz quad-core processor
- 8GB memory
- Built-in 802.11a/b/g/n dual 2.4GHz/5GHz Wi-Fi
- DLNA support
- Bluetooth-enabled
- Optical image stabilization
- Face detection
- TTL auto focus, manual focus
- Normal/macro/auto macro focus
- Three AF modes
- Four exposure control/metering modes
- 25 shooting modes
- 19 Smart Auto modes
- 13 filter effects
- ISO sensitivity to 3,200
- Samsung apps
- Instagram, Paper Artist, Photo Wizard, Video Editor, AllShare Play, S-Suggest, S-Voice
- ChatON
- Full HD 1080p movie mode at 30fps
- 2 years of 50GB DropBox access
- microSD/SDXC card slot
- USB 2.0 port
- Headphone jack
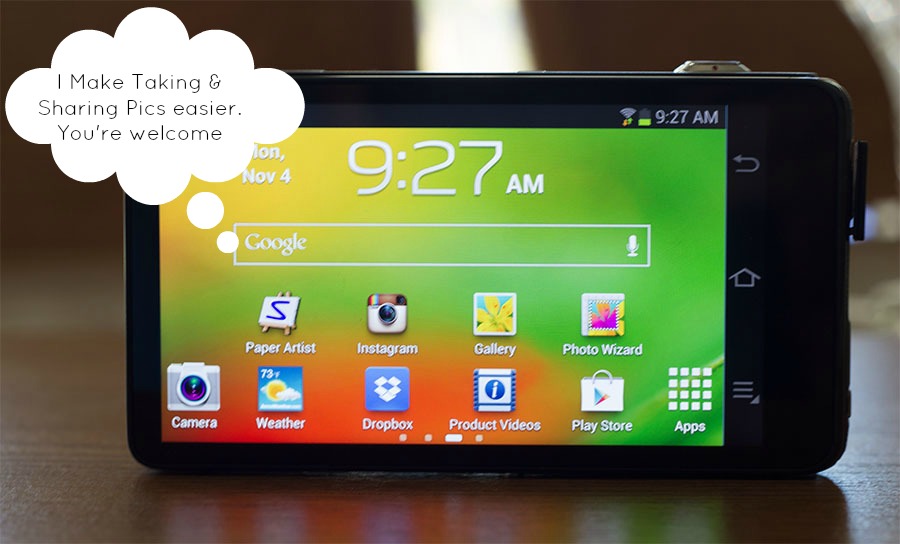
I love this camera, I mean LOVE it. First of all I love being able to share my pics directly from the camera. Before I would have to load them up to the computer to share and if I wanted to Instagram I had to use my phone, which takes horrible pics. Now I can Instagram incredible pics right from the camera. I will admit it is a little frustrating when I am at events because if you don’t have wifi you have to wait until you do. But that is a small price to get fabulous pics to share. Yes, I still use my phone but the Galaxy goes everywhere I do and I find myself taking pics with it more and more.
It is great for all photo opps ( sporting events, etc) but my main concern was; can it take good food pics? That was the whole point in my world. Total honesty, it took a bit to learn how to use the camera to get good food photos but once I did, I hardly use my DSLR now.
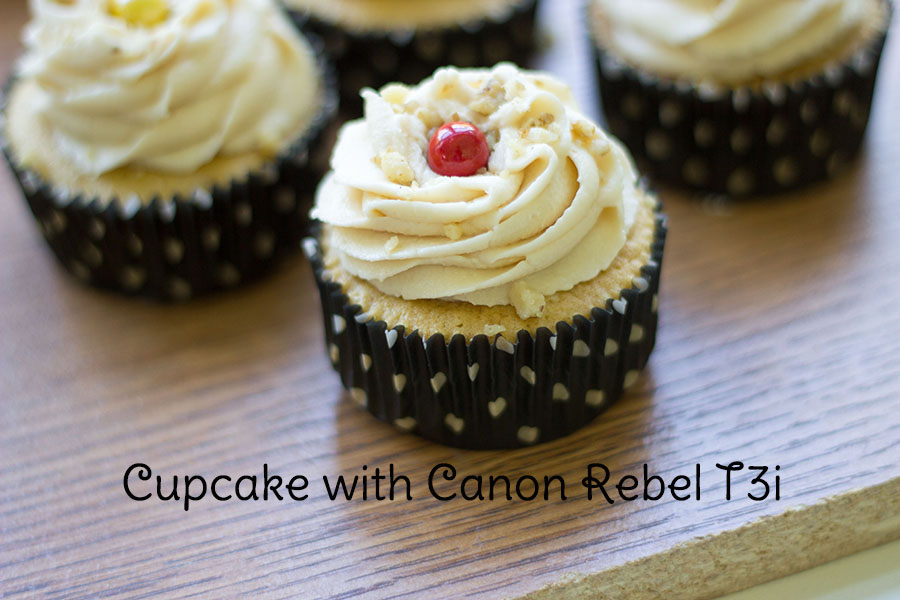
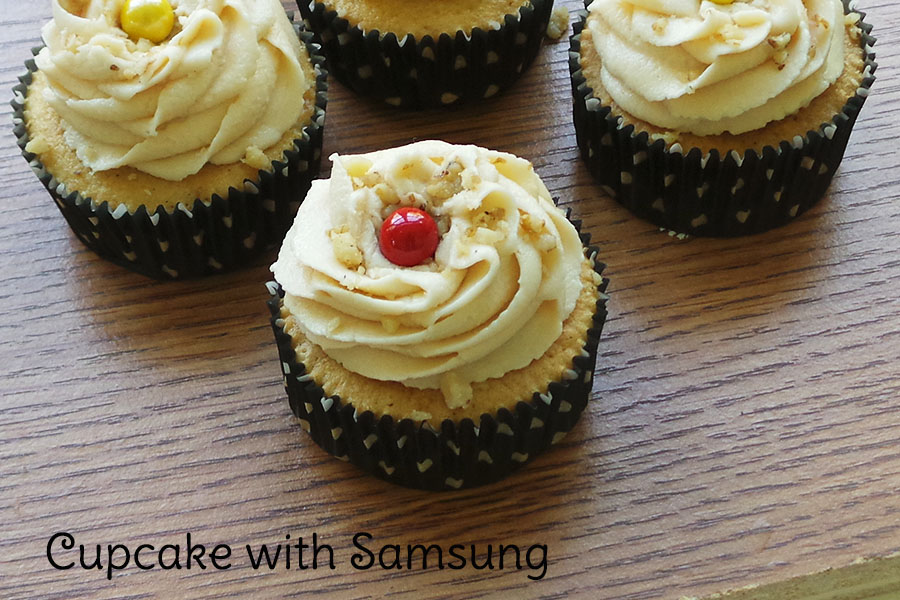
I took a pic of a cupcake to show you how a pic with the Samsung looked and how one with the Canon looked. I tried to get the same shot but no shot is ever the same because the light moves constantly. I was able to get more blur in the background from the Canon because of my lens but really that is the only big difference I can see. Both shots are beautiful but I must admit the Samsung was easier to use on the tripod and I was able to zoom out, getting a more focused shot.
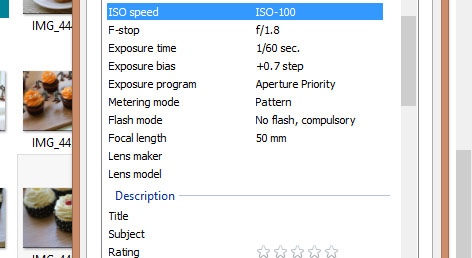
Whether you are using a DSLR or this nifty Galaxy you always get the best photos when you use special settings. With the Canon my settings were:
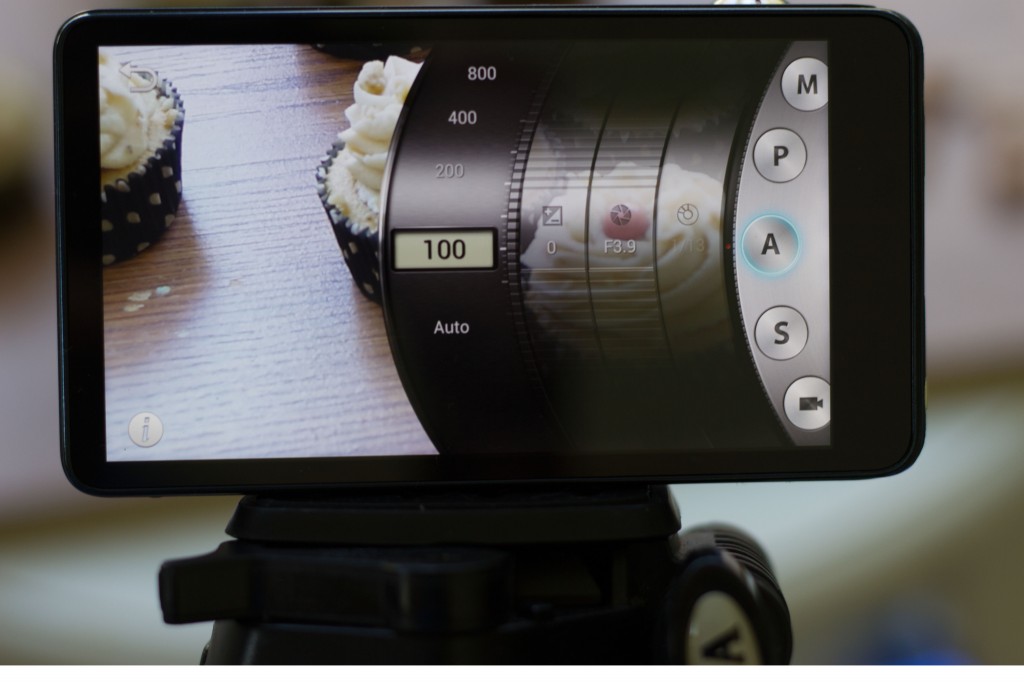
On my Samsung I pressed Mode ( did I mention the Galaxy is touch screen? It is, woo!) and then chose A as my setting. I then used these settings:
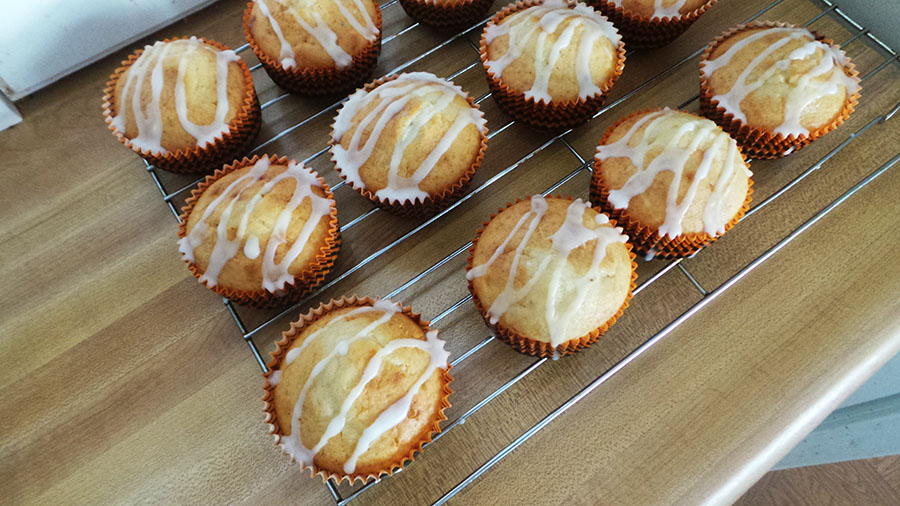
Let’s face it though, sometimes you don’t feel like dragging out the tripod, you are tired, busy and want to just take the dang pic. Well, I can honestly say this little camera does amazing food shots on Auto. I took this one on Auto and it turned out awesome!
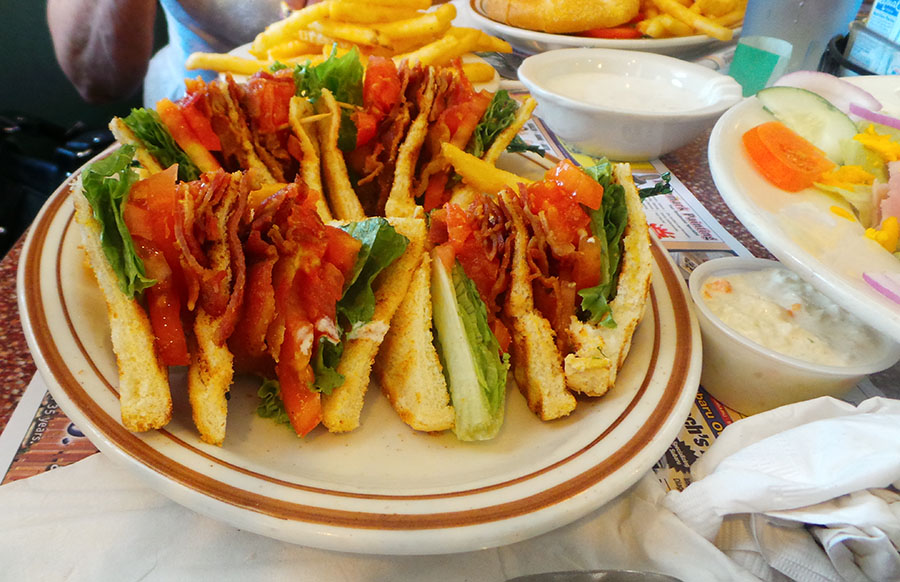
One of the fun things about going out to eat is taking pics of what you are eating and sharing with your friends. However, most of our pics don’t turn out the best and actually make the food look less appetizing. That is the reason why so many chefs are wanting to ban photos being taken in restaurants. The Samsung as a food setting and it actually provides enough light to get amazing pics in a restaurant. I took this pic when we went to a diner in PA. Despite the fact we were in a corner booth where there wasn’t good light the pic turned out awesome thanks to the food setting.
I am a minimalist photographer, meaning I really just want to show you the food I made not the 1500 props I have in my house ( in other words I am not creative enough to do those style pics). So I called on my creative foodie friends to give you some advice that went beyond Natural light and depth of photos.
Food Photography Tips from My Bloggy Friends:
Deb from Just Short of Crazy- Here’s a tip for food photos in a restaurant. Don’t use your camera flash (annoying + looks bad) instead light the food with your iPhone flashlight (or similar). The result is significant. Used last week in dim restaurant & I was impressed with how the images looked.
Danielle of Simm Works Family- Check thrift stores, the 99 cent store, Dollar Tree, etc for great props for photos. From different sizes and style dishes, to cups and accents, having a variety of props to choose from always helps stage the photo better.
Amber o f Jade Louise Designs- For a nice chic wood surface/background Use wood looking vinyl as your “table” they are fairly easy to find on etsy. For more crisp images, use manual settings for better capture and white balance. But use a small table tripod to ensure crisp and in focus pictures
Sarah of Mindfully Frugal Mom- Don’t be afraid of the manual settings. There are 1,001 online tutorials that are easy to understand. Or just take the time to play with the settings. Get off automatic.
Jess of Million Moments- You need to properly balance the elements in your photo, and fill your frame with things that complement but don’t overpower your subject. Create yummy Bokeh (the amazing blurry background behind a tack sharp image) by opening up your aperture in manual mode. Tripods are too limiting, don’t be afraid of getting into funny positions and angles to get “the” shot.
Pinch of Yum- A hand mirror is a great way to bounce light around. It can be more a little bit more directed than your regular old reflector. Just hold your mirror across from the window, angle it down at the food, and you’ll be able to manipulate some highlights into a particular spot in the photograph.
Delicious Instanbul- Tell a story with your photos. What makes photographs stand out? Yes, they might feature beautiful foods and smiling people, but most importantly – they tell a story. Your story. Do you want to take your reader to the vendors you shop from? Or walk them through your preparation process? Or possibly show how the meal was eaten by your happy family or friends? You need to think about this before even touching your camera. What’s your story?
Udemy.com- Try different angles – perhaps a low side-view, an off-center bird’s eye view, an extreme close up, etc. You want the focus to be on textures and colors and sometimes the only way to achieve this is to try every angle possible.
Kirsten of Farm Fresh Feasts- Take a lot of pictures. It’s not like it costs money to have them developed. As much as possible, look at them soon after you take them. It’s not about the camera. A camera is just a tool. The person wielding the tool is the important part. Study food photos that appeal to you to train your mind and help you set up what you want to see.
Jennifer From Savory Simple- Always shoot Raw.
Kristin from Dizzy, Busy and Hungry- 1- Unless you have natural ability to do this yourself (I do not), use a color wheel or palette creator to help plan a color scheme that really works! 2- Also, using backgrounds/props that make the food ‘pop’ usually works out really well. 3- Lighting is everything and I try to avoid harsh light or dark shadows whenever possible (unless they are needed for setting a particular mood).
Carla from Chocolate Moosey- Find inspiration. – If you’re like me, you are always looking for ways to improve your photographs. Look around you. Cookbooks, magazines, blogs, Pinterest. Photos are everywhere! Pay attention to them. Which ones do you really like? Which ones make you roll your eyes? Do they have props? No props? A lot? Minimal? What about the lighting? Are they bright? Dark? If you don’t like a photo, why not? Too many props? Too dark? Too boring? I have a folder on my computer of photographs that inspire me. When I am having trouble styling, I browse these pictures and try to visualize what I want. Don’t confuse that with copying – my pictures very rarely end up like any of them. I may like the way one picture is styled but has too many props. Or there may be one with cool props but the styling is too complex.
Natural light is wonderful and so is all the tips above. But what if you live in a cramped apartment with no windows or you have windows but very little light? My bloggy friend Ronni Keller from SassyGirlz.net has some great advice for using a light box!
What are some tips you have for people using a lightbox?
Do NOT assume having 1 makes your pics all of a sudden look awesome. You need to learn to use it just like any other piece of equipment. It does take some getting used to. Also, some things just look ‘stuck in a box’ and no matter how you try to set it up, will have the ‘box look’ to them. Either make that part of your style, or wait until you can take a pic without the box.
What type of lightbox do you recommend?
We bought a fairly inexpensive ‘ten’ on Amazon. I would 100% start there with something small and inexpensive until you see if it’s something you even like/want to work with. It is awkward, bulky and as I said, takes some getting used to. don’t invest in anything fancy until you test it out. From there, we found a great tutorial on how to make your own since it was a bit small. We made 2 lights and bought cheap white board that we can make as big or small as needed from there. Not everything will even fit into a nice little square box, so I love that our handmade 1 is less expensive but way more flexible. and, if my husband can throw it together from common item at Home Depot, ANYONE can!!
What are some difficulties you can run into while using a lightbox? What do you do to overcome them?
They are limiting in size. They can take up a lot of room in your home/work-space, and they are not a magic cure for everything you need to photograph. You need to get a bit creative dealing with all of that. And some foods if that’s what you’re shooting, will melt, mush, fade under lights much quicker than not. Frosting, for example turns very soft and will start to slide off a cupcake. You either learn to shoot quicker, better, faster… Or, you freeze the perfect looking cupcake so you have a longer window of time to get the perfect shot.
What is you favorite thing about using a lightbox?
In the Summer, we are not outside in 120* heat in Las Vegas taking photos of things. Natural light can be a double edged sword as well
What would you suggest someone have in their lightbox kit? ( i.e. background, tweezers, etc.)
Different colored backgrounds. You can buy cheap material at any craft store, or Walmart even. Different colored ‘board’… Some good tape. You never know when you’ll have to stick a background up (or to something) Maybe a spare bulb. At least 1 decent sized piece of whiteboard to bounce light… you’ll move it around a lot depending on what your shooting… and patience! Have a lot of patience.
Again, food photography can be a pain but with a little patience and the internet at your fingertips it can be a fun and creative process. It is all about practice. The tips my bloggy friends just told you didn’t come from their head ( well maybe in a way) but from experience. My first food photos were horrible and I am embarrassed to think of how proud I was of them, lol. It took a lot of patience to get where I am now and I am still learning. The Samsung Galaxy Smart Camera has definitely helped me be more flexible in my photos. Experiment, practice but above all, EAT! Get that shot because that good food is waiting for you!
Note- At the time of this writing QVC has the Samsung Galaxy Camera ( for the foodie on your holiday list) on easy pay for $499.95 and the payments are stretched 5 months, making them $99.99 a month. Easy pay is a wonderful way to get all of your holiday presents. We have a lot of QVC Christmases here, lol. For more info on Food Photography check out my posts- Food Photography Got You Down? and Food Photography Resources.What are some of the obstacles you face when getting a good food photo shot?

I have a Cannon as well as a Samsung, not sure on the exact models. I swap them out depending on the event. I never use the Samsung outdoors on bright days because I can never see what I am taking a photo of on the screen, otherwise I would love to use it all the time.
Jennifer Williams recently posted..Running for Jaxson Weekly Recap – November 4
Caleb says
The right kind of camera does make all the difference when you are taking pictures and want quality results.